
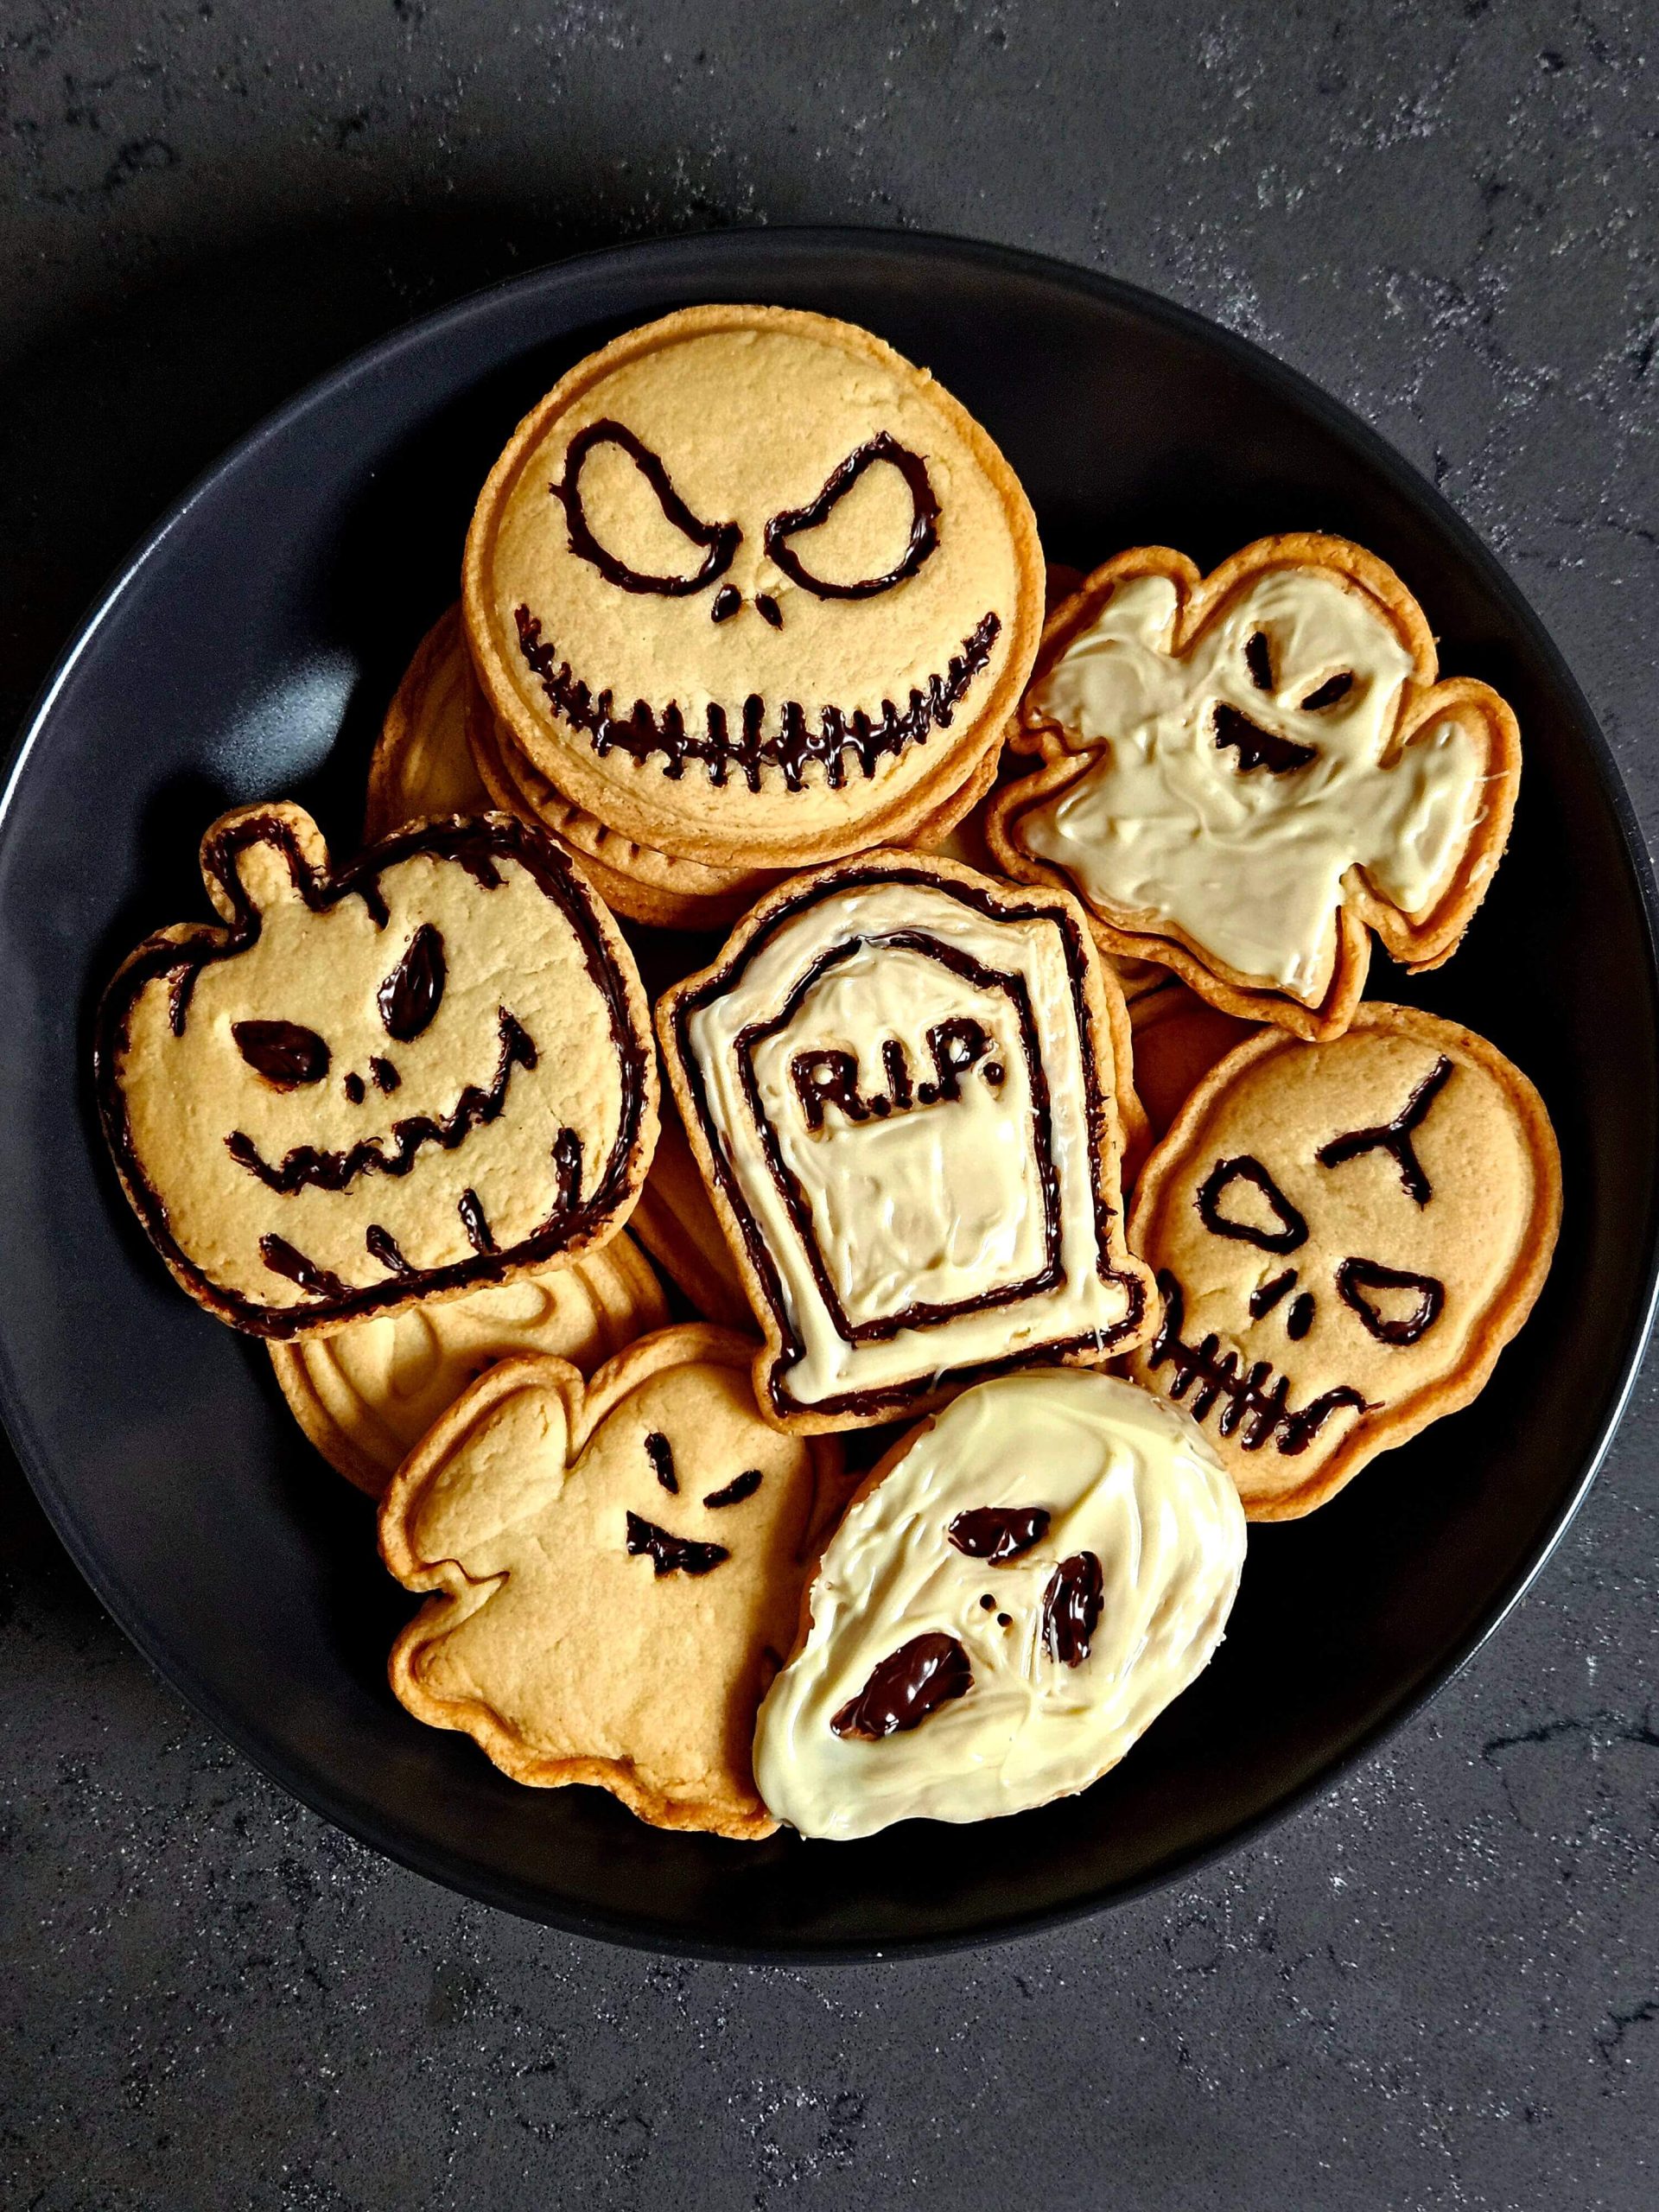
Halloween Cookies, with fresh lemon flavor and spooky appearance, are one of the easiest and tastiest cookies you can prepare on Halloween. If you are looking for healthy halloween cookies with natural ingredients and toppings, this recipe is just for you. Today, we will see how to bake the perfect halloween cookies without using any unhealthy products, such as syrups or additives, for fancy hallloween decorations.
Ingredients
Unsalted Butter: Using unsalted butter gives a tender texture and rich flavor to the halloween cookies.
Granulated Sugar: Sweetens the cookies and contributes to a slightly crispy edge. You can also use powdered sugar for softer cookies, but keep in mind that soft dough will be hard to shape with cookies cutters.
All-purpose Flour: The primary structure-building ingredient. Too much flour can lead to dry cookies, so balance is key. You can always add more flour if they stick on cookie cutters while shaping the dough.
Egg: Acts as a binding agent, ensuring the cookies hold together while providing moisture for a soft texture.
Baking Powder: Add for cookies to rise just a little, making them soft and slightly airy.
Lemon Zest & Juice: Adds brightness and a tangy citrus flavor that complements the sweetness of the cookies. Adding too much juice can create a wet dough with sour taste, so add controllably.
Optional Toppings (Lemon Glaze or Melted Chocolate): The lemon glaze intensifies the citrus flavor while chocolate provides a rich, contrasting flavor, making the cookies more decorative and festive.
How to Make Halloween Cookies?
Preheating the Oven (180°C/356°F): Ensures the oven is hot enough for even baking when the cookies go in.
Creaming Butter, Sugar, and Egg: Creaming these ingredients with a mixer creates air pockets, which help give the cookies a light and fluffy texture. Also, whisking the egg well will prevent egg smell while eating the cookies.
Adding Lemon Zest and Juice: Once the mixture is creamy, the citrus ingredients are added to infuse the dough with a bright lemon flavor.
Combining Flour and Baking Powder: Mixing dry ingredients separately ensures even distribution of the baking powder, which is crucial for proper leavening.
Incorporating Dry Ingredients into the Wet Mixture: Gradually mixing in the flour helps create a balanced dough. The dough should be slightly dry but still workable.
Chilling the Dough (30 minutes): This resting period allows the butter to firm up, making the dough easier to handle and shape.
Rolling and Shaping the Dough: Rolling out the dough after chilling makes it easier to cut with cookie cutters, allowing for Halloween-themed shapes.
Baking the Cookies (15-20 minutes): Baking until golden brown ensures the cookies are cooked through with a crisp edge and soft center. You can cook longer for more crispy halloween cookies.
Resting the Cookies (5 minutes): Allowing the cookies to cool slightly prevents them from breaking apart when handled.
Applying Lemon Glaze or Chocolate: Glazing or decorating the cookies while they cool allows the toppings to set properly. The glaze adds extra flavor and moisture, while the chocolate provides richness.
Key Notes
Chilling the Dough: Chilling the dough for 30 minutes is important. It helps firm up the butter, making it easier to roll out and cut shapes without sticking. It also prevents the cookies from spreading too much while baking.
Lemon Flavor: If you prefer a more intense lemon flavor, you can increase the amount of lemon zest slightly, but be cautious with the lemon juice to avoid overly wet dough with a sour taste.
Cookie Texture: These cookies are meant to be soft in the center with slightly crisp edges. If you prefer crispier cookies, leave them in the oven for a couple of extra minutes.
Baking Time: Check the cookies around the 15-minute mark. Baking time can vary slightly based on your oven or the thickness of the cookies. Look for a golden-brown edge as a sign they’re done.
Toppings: Both lemon glaze and melted chocolate are optional but can enhance the flavor and visual appeal. If using the lemon glaze, apply it once the cookies have cooled slightly to avoid it melting off. The chocolate can be drizzled or used to add details to the Halloween Cookies.
Storage: Store the cookies in an airtight container at room temperature for up to 4 days. If using glaze or chocolate, ensure they are fully set before stacking to prevent sticking.
Custom Shapes: You can easily customize the cookies for any holiday by changing the cookie cutter shapes and toppings to match the theme.
Serving
Pair with Beverages: These lemon cookies pair well with warm drinks like spiced apple cider, hot chocolate, or a festive punch. For adults, consider serving with mulled wine or a lemon-flavored cocktail.
Glaze and Chocolate Decorations: For a Halloween-themed look, drizzle the cookies with colored glazes (orange, green, or black) or decorate with melted dark and white chocolate for skulls, ghost faces, or other spooky designs.
Cookie Gift Bags: Wrap individual cookies in clear cellophane and tie them with Halloween-colored ribbons (orange, black, purple). They make perfect party favors or treats for trick-or-treaters.
Finally, you will have healthy Halloween Cookies with fresh lemon flavor. Baking these cookies for your family and friends during the spooky season will be special and fun for all. Enjoy your spooky cookies, and Happy Halloween!
More Recipes You’ll Love
- Cinnamon Walnut Cookies
- Chewy Chocolate Chip Cookies
- Easy Homemade Chocolate Brownies
- Marble Cake Recipe
- Hazelnut Cake

Ingredients
For the Cookies:
- 125 grams unsalted butter
- 105 grams granulated sugar
- 2 cups all purpose flour
- 1 egg
- 1 teaspoon baking powder
- 1 tablespoon lemon zest
- 1 teaspoon lemon juice
For the Topping:
- Lemon Glaze (optional)
- Melted Chocolate (optional)
Instructions
- Preheat your oven to 180°C (356°F).
- Grab a bowl and whisk the sugar, egg, and butter with a hand mixer until it gets creamy and combined well.
- When the mixture gets creamy, add the lemon zest and lemon juice, and keep whisking.
- In another bowl, mix flour and baking powder, stir well to combine.
- Transfer dry ingredients into bowl with creamy blend. Keep adding flour until you have slightly dry dough.
- Let the dough rest in fridge for 30 minutes.
- Roll out the dough, and cut into shapes with halloween cookie cutters. Then, place them evenly spaced on baking sheet over oven tray.
- Bake the cookies for around 15-20 minutes. Take them out when they start to turn brown.
- Let them rest for 5 minutes.
- For the glaze, whisk the powdered sugar and lemon juice powder until you get a pourable glaze forms. Cover the rested cookies with the mixture.
- You can also use melted white and dark chocolate to decorate your halloween cookies.
Notes
- Chilling the Dough: Chilling the dough for 30 minutes is crucial. It helps firm up the butter, making it easier to roll out and cut shapes without sticking. It also prevents the cookies from spreading too much while baking.
- Lemon Flavor: If you prefer a more intense lemon flavor, you can increase the amount of lemon zest slightly, but be cautious with the lemon juice to avoid overly wet dough.
- Cookie Texture: These cookies are meant to be soft in the center with slightly crisp edges. If you prefer crispier cookies, leave them in the oven for a couple of extra minutes.
- Baking Time: Check the cookies around the 15-minute mark. Baking time can vary slightly based on your oven or the thickness of the cookies. Look for a golden-brown edge as a sign they’re done.
- Toppings: Both lemon glaze and melted chocolate are optional but can enhance the flavor and visual appeal. If using the lemon glaze, apply it once the cookies have cooled slightly to avoid it melting off. The chocolate can be drizzled or used to add details to the Halloween shapes.
- Storage: Store the cookies in an airtight container at room temperature for up to 4 days. If using glaze or chocolate, ensure they are fully set before stacking to prevent sticking.
- Custom Shapes: You can easily customize the cookies for any holiday by changing the cookie cutter shapes and toppings to match the theme.